
Kodi is termed a multi-purpose tool as it lets anyone stream on-demand content or watch live TV. Besides this, it helps you easily gather all the media files and access them smoothly. Kodi wouldn’t be this function without the addons classified under different genres like movies, music, live TV, etc. However, lots of addons are location-specific and cannot be accessed from anywhere. In such a scenario, the Kodi users can opt for a VPN service to unblock the geo-restrictions. A Best Kodi VPN will ensure your privacy and security by keeping your identity anonymous.
In addition to this, a VPN is a must as Kodi supports installing third-party addons, which in turn comes with copyright infringements. Kodi VPN Free will hide your identity from the trackers, and not even the ISP can trace your location or internet activity. So a VPN will let you stream unlimited video content on Kodi from anywhere without any limits. By getting in this article, you will be dealing with the steps to install VPN for Kodi in detail.
How to Install VPN on Kodi
A VPN seems to be mandatory to access Kodi contents to the fullest. So, it is important to get the right VPN on Kodi-installed devices. There exist different ways to install Kodi VPN, while the working methods are discussed below.
Method 1: Steps to Install VPN on Kodi Krypton 17.6
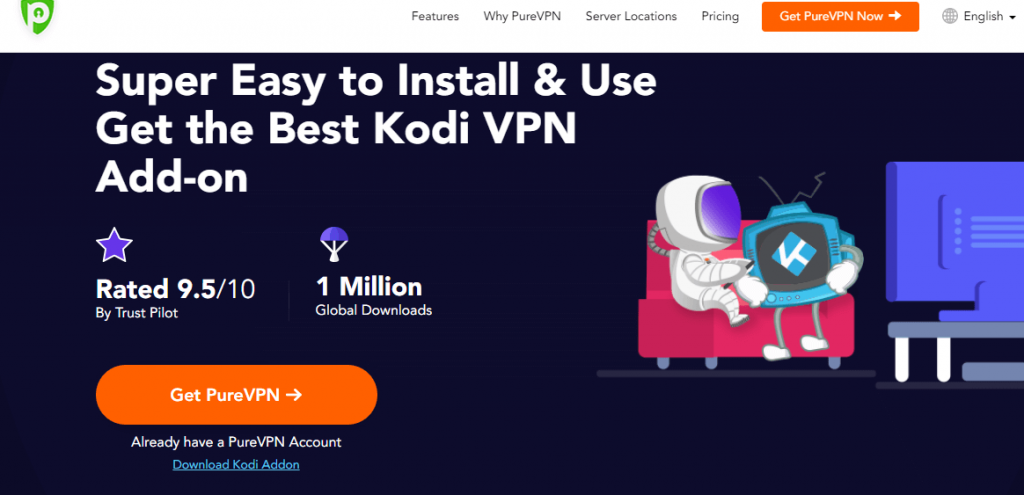
This method involves installing a dedicated Kodi VPN Addon. For example, choose PureVPN as it has a dedicated VPN Kodi add-on version. Get to know the steps to install a VPN on Kodi addon from below.
Note: Ensure you have created a PureVPN account and subscribed to a plan just before proceeding with the installation.
Step 1: Open any web browser on any Kodi installed device.
Step 2: Use the address bar to visit https://www.purevpn.com/download/kodi.
Step 3: Click on the Download Kodi Addon link available below the Get PureVPN button.
Step 4: Wait for the PureVPN repository with zip extension to complete its downloading process.
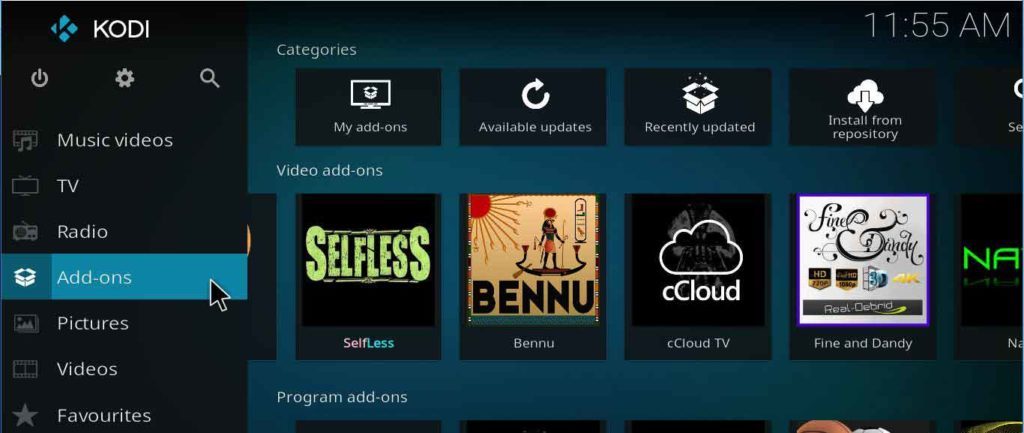
Step 5: After that, launch the Kodi app on your device and click the Add-ons tab on the left pane.
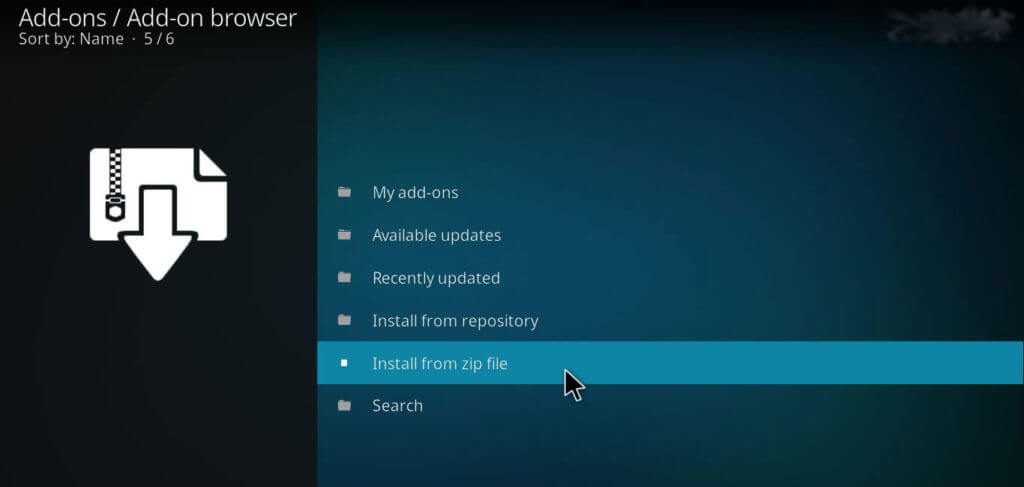
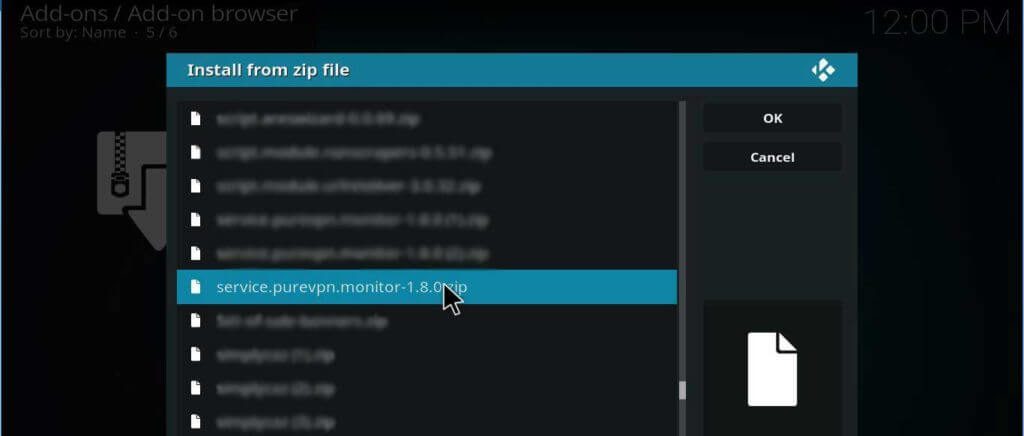
Step 6: Choose the Install from zip file option shown on the next screen.
Step 7: On the dialog box, browse the download location of the zip file that you have downloaded (in Step 2). Then, click OK.
Step 8: Navigate back to Kodi main menu further > select Add-ons > click Program add-ons > choose PureVPN > tap Add-on Settings.
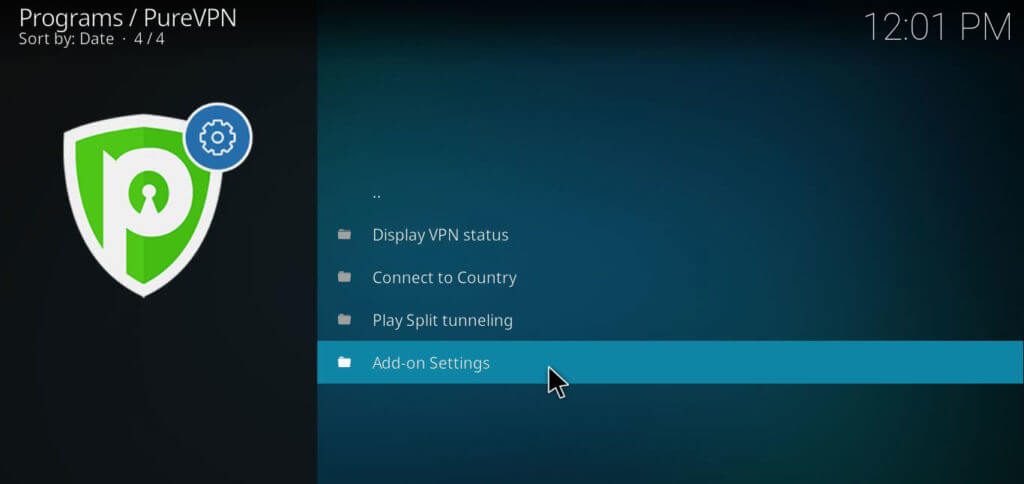
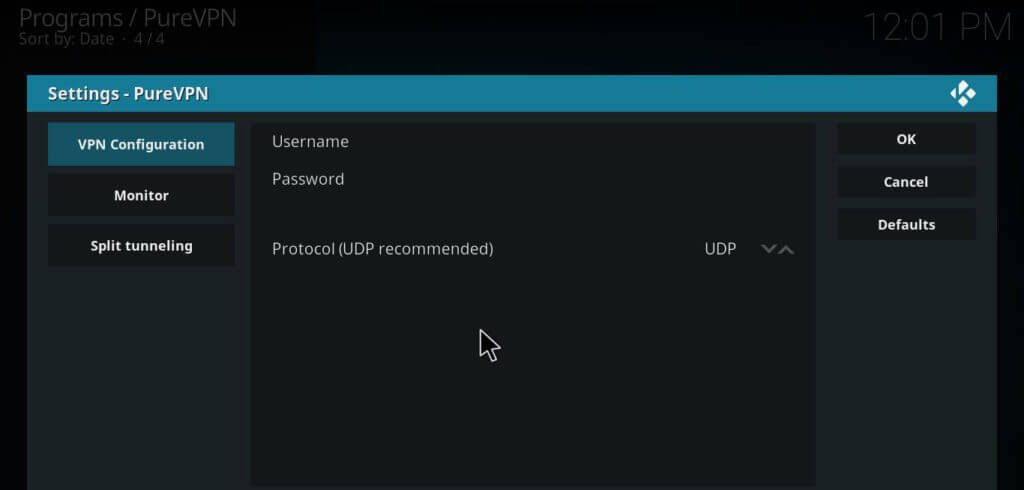
Step 9: Enter your PureVPN login credentials on the shown dialog box. Further, click on the OK button.
Step 10: Finally, connect to any the server from the list to access Kodi using a VPN.
Method 2: How to Install Kodi VPN on Kodi Leia 18.0
The steps given below will help those Kodi Leia users to install Kodi VPN addon.
Step 1: Launch the Kodi app on your device at first and select Add-ons.
Step 2: Choose Download > Program Add-ons > Web Viewer > Install.
Step 3: On the Kodi main screen, select Add-ons > hit Program Add-ons > choose Web Viewer.
Step 4: Next, enter the link of a Kodi VPN. For instance, click here to download PureVPN. Tap OK when prompted.
Step 5: Select the download location to store the PureVPN zip file and tap OK twice.
Step 6: Navigate to Kodi main screen further, hit Add-ons > click the Package Installer icon.
Step 7: Choose the Install from Zip file option and select the location in which the zip file is stored.
Step 8: Go back to Kodi main screen > tap Add-ons > select Program Add-ons > launch PureVPN.
Step 9: Click Add-on Settings to enter your PureVPN username and password to log in.
Step 10: Choose the country or the server to connect with the web > click OK to start using Kodi and its services from anywhere.
Method 3: How to Install Kodi VPN on Router
Those with DD-WRT or Tomato routers can follow this method to set up VPN on Kodi.
Step 1: First of all, launch your Tomato router control panel and log in to it.
Step 2: Click the Basic option, after that select Network on the left panel.
Step 3: Choose Connection Type on the drop-down menu.
Step 4: Provide the login details of your VPN service provider.
Step 5: Click to check in the Use DCHP, and Use Default Gateway filed on Remote Network.
Step 6: To connect to PPTP Gateway, enter the server address and establish a connection.
Step 7: On the Connection Mode drop-down, select the Keep Alive option alone.
Step 8: Ensure if MTU, LAN or wireless settings are set to default.
Step 9: Meanwhile, never change Options field or Subnet Mask.
Step 10: Finally, scroll down to click on the Save option after making all the changes.
Kodi is available for
- How to Install a VPN for Kodi [2022 Kodi VPN Guide]
- How to Install Kodi on Raspberry Pi 2022 [Guide]
- Kodi for Android Phone/ Tablet Download [New Version]
- How to Install Kodi on Xbox 360 and Xbox One [2022]
- How to Install Kodi on Roku TV [Guide 2022]
- Kodi for Linux / Ubuntu: How to Download and Install
- Kodi for Mac Download Free [Latest version 2022]
- How to Install Kodi for Apple TV [All Generations]
- How to Install Kodi on Android TV/Box [Guide 2022]
- How to Install Kodi on Kindle Fire Tablet [Easy Method]
To Sum Up
You can try installing a Kodi compatible VPN on your device using any methods discussed here in this article.
Hope the information provided about VPN for Kodi is useful to you. Got any questions or suggestions? Share it as comments below.